

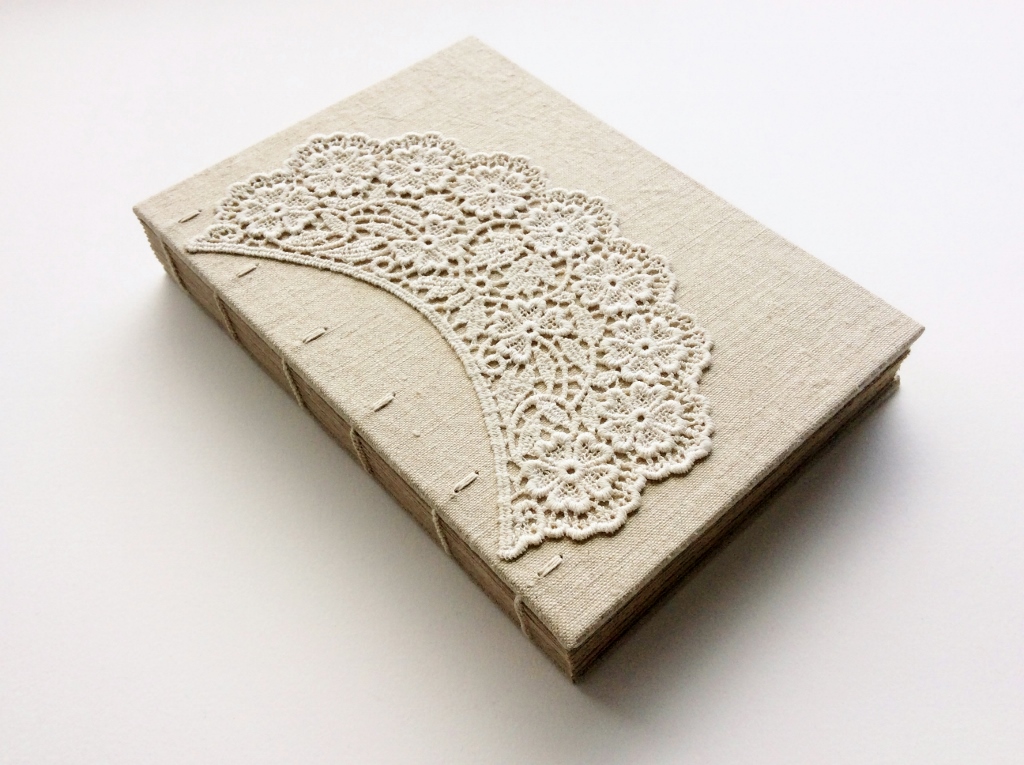

I just finished listing these four on Etsy and I thought I'd share a few lace related tricks with you tonight, in case you want to add some lace to one thing or another (maybe not on a book cover, though, especially if you're planning to sell that book, because that would be kind of a bad thing for you to do after I took the time to write down these instructions). I've been making books with vintage lace covers for I have no idea how many several years* and I'd like to think I've pretty much perfected my lace glueing methods. When I first had the idea of using some of my/my mother's vintage lace in book covers I honestly didn't think it could be done; I make books that are inteded for actual use, not just for looking at admiringly, which means the lace needs to be firmly stuck onto the cover material, which, of course is easier said than done, lace being, well, lace, with holes all over and glue going through said holes fairly uncontrollably. With some trial and error, but mostly with common sense, I came up with these four methods for different types of lace:
1. Just glue it
Stiffer types of lace on the heavier side are perfect for this method.
Stipple on glue on the reverse side (determining which side is the reverse can sometimes be an art in itself) with a waste paper under your lace. For this I use PVA glue that's pretty thick (having thickened after I've forgotten to seal the glue jar properly, which is why one needs several glue jars for different thicknesses). Stippling motion is crucial because you don't want excess glue building up in the holes of your lace, or for your lace to move around on the waste paper and getting all gluey on the front side, too. Once you've covered the lace with a moderate amount of glue, you ever so gently flip it over by picking it up by the edges, and place it where you need it before very gently pressing it down with the palm of your hand first. If the piece you just glued is large, you might want to place a sheet of non-stick material, like wax paper, over it and rub it down with a bone folder.
2. Have your lace make a layover
Some really delicate lace with large holes is best glued by creating a "layover" sheet of glue for it to pick up glue from. This one is the method that requires the quickest fingers.
Spread a thin layer of glue (not too thick, but definitely not runny) onto a sheet of transparency film, or some other smooth surface, like glass (if you're up to washing it afterwards), and gently place your lace onto it, making sure it touches the glue everywhere. Quickly, and carefully, lift the lace by its edges (you may want to use tweezers), and place it where you want its final destination to be. Rub down as explained before.
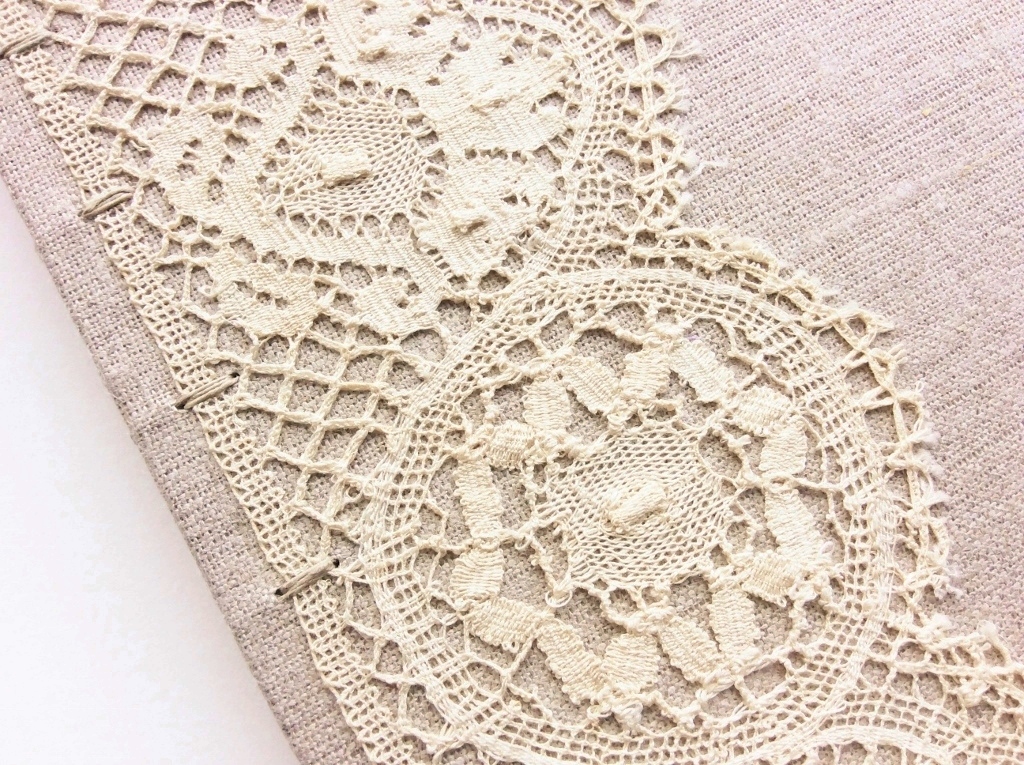
3. Glue it in steps
This one works for lace that has some structure and is made of somewhat heavier weight thread.
Pick a starting point (an edge would usually be ideal) and mark where you want to stick it. On a waste paper, glue that edge by stippling on very, very thick glue. Only glue a small area along the edge since that glue is going to dry quicker than you can stipple since the lace absorbs moisture from the glue, too. Carefully place that glued edge into position and press down firmly. Then, fold over the loose side, place a clean waste paper under it and stipple on another narrow strip of glue. Press down, repeat until you run out of lace to glue, making sure you always have a clean waste paper to glue on.
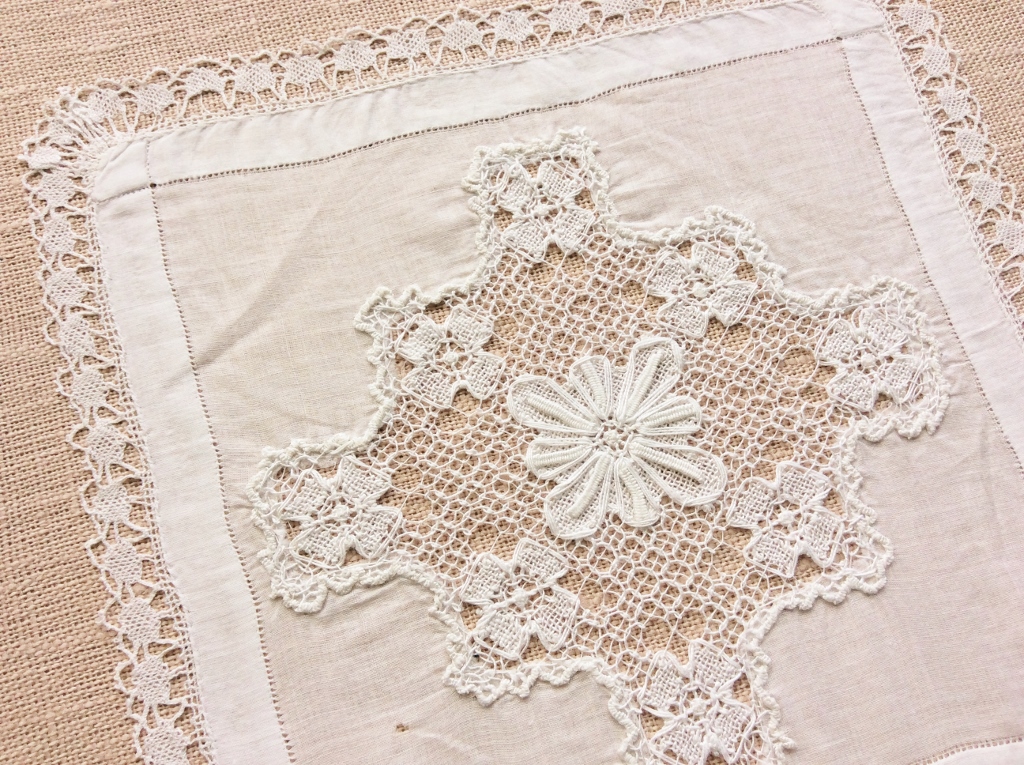
4. Glue the receiving surface
This one is for dense lace with small holes, regardless of the weight. I use this for lace that is netted tulle and for heavy crochet lace, as long as there are no large areas without thread where the glue would show through disturbingly.
Place your lace where you're planning to glue it, and use masking tape to tape around it (you might want to use washi tape that you've first stuck onto your shirt, or somewhere, if the receiving surface is very delicate and masking tape might stick too hard). Remove the lace and stipple on a very thin layer of glue (thin, but not watery) inside that taped area. Press down your lace gently, carefully remove the tapes, and rub down as explained before.
For the above books I used methods 1 (the crescent one), 3 (first and third one, with slight modifications for the third one = it's not fully glued on, just the lacy bits) and 4 (the last one). For obvious reasons (that is, mostly out of indolence) I try to avoid method 2 unless I have a spectacular piece of fancy lace. It's actually a method I learnt at school while studying leather onlays; it's perfect for glueing teeny tiny leather letters like the ones I used for Yann. I hope these instructions are useful to someone planning on glueing lace or other fiddly bits!
*actually, the first book in which I used vintage lace I made in 2003 and it had dark brown velvet covers and gorgeous brown cardstock pages, and I've never used it for anything because I love it so much, and naturally, now that it would be appropriate to share a photo of it, it's safely stored away somewhere in my parents' home along with the rest of my "early work".